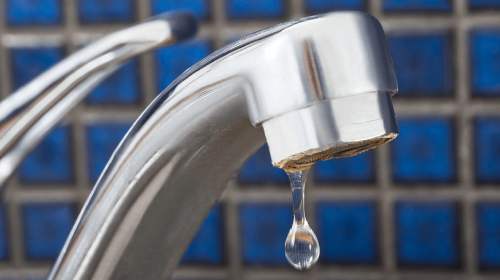
Do you have a leaky faucet and want to attempt the repair before calling a professional plumber? We are here to help!
A leaky or drippy faucet is a common issue which ordinarily effects your homes kitchen faucet or bathroom faucet. While a leaking is not the worst plumbing issue you may face as a homeowner, it can not only raise your water bill, but cause water damage if left untreated. If you don’t feel comfortable fixing a leaky faucet yourself, Contact Da Best Plumbers and we’ll happily fix it for you.
Step 1. Shut off the water to your faucet
Shutting off the water to your leaky faucet sounds obvious, but it’s often the obvious steps that are forgotten.
Whether it is a leaky kitchen faucet or a leaking bathroom faucet you should be able to locate a shut off valve beneath the sink.
Twist the knob on the valve (usually) Counterclockwise to shutoff water to the leaky faucet. If there is no readily available shut off under the sink you may have to turn the water off at the main flow into the house. Once the water is off turn on the faucet to let all the water drain into the sink.

Pro Tip: Plug the drain to prevent losing small parts

Compression faucet is the most common residential faucet. It uses a small stem that raises up or down to control the flow of water.
Ball faucets contain a bearing and a single handle used to adjust the waters temperature.
Cartridge faucets contain a cartridge which rotates to allow the flow of water. These handles often has a decorative cap.
Ceramic-disk faucets contain ceramic cylinders that spin to allow water flow. Most high-end faucets with a single handle on the side are usually ceramic-disk faucets.
Step 2. Remove the faucet handle
This step in fixing a leaky faucet is where the plumbing can be a tad tricky, how you remove the faucet handle is dependent on the type of faucet you are working with so be sure to inspect the faucet carefully to understand what you’re working with.
- Check the rear of the faucet handle for a small screw, using an allen wrench or a hex key remove the screw and place in a safe spot so it doesn’t get lost.
- If the faucet handle has a plastic covering above the screw, you can remove this with a flat head screwdriver then using a philps head screwdriver remove the interior screw.
- Pull the handle straight away from the faucet, pulling on an angle could bend things and cause additional plumbing problems.
If you are working with a leaky shower faucet or leaky bath faucet things may get a little more involved.
- If there is a plastic cap on the handle use a flat head screwdriver to remove it then use a phillips head screwdriver to unscrew the handle.
- Behind the handle there may be a faceplate on the shower wall. this may pop off or If it has threads, unscrew the faceplate from the wall and remove it.
- Find the metal sleeve over the shower valve. Pull it off or unscrew it.
- If the shower valve has a locking clip, pry it off with needle nose pliers or a screwdriver.
Step 3. Remove faucet stem or cartridge
Your faucets stem or cartridge can be found in most residential two-handled bathroom faucets of kitchen faucets. This is how the flow of hot and cold water is regulated.
With a wrench loosen the nut in the handle assembly remove the nut and set aside. With the nut removed gently pull the stem straight out, again pulling at an angle may cause additional plumbing problems.


Step 4. Install a new stem or cartridge
Once you’ve identified the cartridge or stem as the source of your dripping kitchen faucet or bathroom faucet leak, you’ll have to replace it.
Cartridges and stems come in many shapes and sizes, and the easiest way to find the right replacement part is to know the name of the faucet’s manufacturer and the faucet’s model number. If you’re not sure, take the old cartridge or stem you’re replacing to your local plumbing supply store so you can use a reference guide to match it to the exact cartridge you need.
Using a cloth dry and clean the area around the leaky faucet handle and all the parts you are about to re/install.
Inspect and replace any damaged or worn O-rings around the housing.
Align the new stem or cartridge and carefully insert it.
Step 5. Reassemble the faucet and handles
Once you’ve installed the new cartridge or stem, return to the previous steps and reattach the faucet handle. Turn your water line back on and remove any debris or towels from your sink.

Repairing a leaky faucet in a timely fashion can save from you additional plumbing issues down the road. If you are run into any issues or don’t feel comfortable doing your own plumbing Call Da Best Plumbing and make an appointment with one of our certified, licensed and insured plumbers to take care of the problem for you.